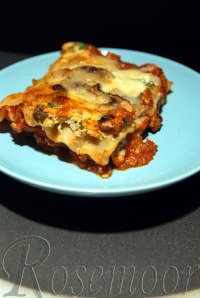
Honeyed Fig

honeyfigWe are on the verge of having French child #3 come to stay with us.  Our house is so lively, almost all the time. The ratio of munchkins to mommas in this house for the past several years has been 5:1. This summer however, that changed! At times it was even 2:2!  Our latest Eurochild bubbled with excitement as his mother made ready her preparations to come.

We had such a lovely time!  We visited Flavorspot, Hot Lips, and Horsetail Falls (close enough to slip over to Multnomah Falls for the ice cream afterwards.)  The munchkins lounged on the bench while we sniffed every flower in the entire Portland International Rose Test Garden. We shopped, got bread at Grand Central, ate chocolate at Moonstruck, and sampled flavors at Jamba Juice.  When it all wound down, we were so sad to part. I do, however, have some lovely gifts that will make the memories last!  A fig tree, blueberries bushes, and brambling berries!  A toast to France! and especially, to Dominique.

Honeyed Figs

  1. Fig
  2. Honey
  3. Water crackers
  4. goat cheese (cream cheese can be used in a pinch)

Slice the fig from top to bottom, into eight slices. Slip the knife along the curve of the white center to remove the skin.

Spread the cheese on the water crackers carefully. (They crack so easily.) Top cheese with the fig slice and drizzle with honey.

Repeat for each slice of fig.

Posted in Cheese, Kaas, Light snacks | Tagged , , , , | Leave a comment

Lasagne

Lasagna by Rosemoor


Lasagna by Rosemoor

There are some foods that instantly bring joy and depression. The thought of consuming a wonderful piece of pasta, sauce, cheese and magic balanced by the overwhelming amount of work to create that moment is the catch-22 of Lasagne.  One of the munchkins requested this dish for a birthday dinner, so there was no getting around the deed.  To make your day shorter than mine, I’m going to suggest several steps to do ahead.

  1. Pre-spice your meat the night before.
  2. Pre-mix your ricotta the night before.
  3. Pre-make your sauce the night before.

If all these steps are done beforehand, the actual time to assemble and bake becomes reasonable.  If not, you’ll spend all day, like I did Monday, cooking a dish that in this house, is gone in 30 minutes. (I usually make two pans and put one up, but both pans were completely gone within 2 hours.)

I finally got frustrated by not being able to find a sugar free, free range, hormone free mix of Italian pork sausage.  Thanks to Grace I can make my own now.

Lasagne

The Meat:

  1. 2 lb finely ground pork
  2. 1 1/2 teaspoons rubbed sage
  3. ½ teaspoon thyme
  4. 1 teaspoon ground pepper
  5. 1 1/2 teaspoon sea salt
  6. 1 1/2 teaspoon parsley flakes
  7. ¼ teaspoon red pepper flakes
  8. ¼ teaspoon ground nutmeg

Cheeses:

  1. 1 bunch fresh Italian parsley
  2. 8 oz. ricotta
  3. 1 egg
  4. pinch of salt
  5. 12 oz mozzarella

The Sauce:

  1. 1/2 white onion
  2. olive oil
  3. 2 cloves garlic
  4. 6-8 mushrooms
  5. 2 tsp. Oregano
  6. 2 tsp. Basil
  7. 1 tsp Fennel
  8. 6oz. tomato paste
  9. 28 oz. diced tomatoes
  10. 1 cup red wine
  11. 2 jars of premade unsweetened tomato sauce

Noodles:

1 box not precooked lasagne noodles

Other optional vegetables:

  1. fresh chopped spinach
  2. 1/2 bell pepper
  3. additional onion
  4. black olives
  5. 1 small eggplant or zucchini
  6. 1 large slicing tomato

Steps that can be made ahead:

In a medium bowl mix together the meat and the spices for the meat. This should marinate for several hours or overnight.

Roughly chop parsley and mix in a medium bowl with salt, ricotta and egg. Cover and refrigerate.

Chop the onion into medium dice. Finely dice the garlic. Remove the stems from the mushrooms and slice them into 1/8th inch slices. Saute the onions in the olive oil for 5 minutes, then add the garlic and mushrooms. Cook for  3 minutes, then add oregano, basil, and crushed fennel seeds. Warm spices and then tomato paste, diced tomatoes and red wine in pan. Cook the tomatoes for 5 minutes, then allow to cool a bit before pureeing in a food processor. This can now be refrigerated ahead for tomorrow if desired.

To Assemble Lasagne:

Bring water to boil in a large stockpot, as per package instructions for the noodles. I break them in half as they are easier to deal with and it makes no difference in the taste.  Add a pinch of salt to the water while boiling and stir gently at intervals. These puppies like to stick together and make a big mess. Don’t let them.  Once they’ve boiled for 10 minutes, pour them out into a colander.  Add oil to the bottom of the stockpot and refill it with warm water.  Stir the water and pour the noodles back in. You don’t want them to cook, stick, or be too hot to handle.

Brown the pork while the noodles are boiling.  Pour off any fat and make sure the pork is in very small pieces.  Once the pork is cooked, add all of the red sauce and stir.

Grate all of the mozzarella.  Slice any fresh vegetables you may be using. Arrange all of the pots to where you can move easily between them and your 9×13 pans. You will be needing two 9×13 baking dishes. Preheat your oven to 375 degrees.

Begin by layering red sauce in the bottom of the 9×13 pans. Cover these with a layer of pasta noodles. Using a spatula, coat the noodles with the ricotta cheese mixture.  Top with a layer of mozzarella. If you are using fresh vegetables, layer them in now.

Repeat the entire layer process, starting with the sauce, continuing with the noodles, the ricotta, the cheese and then vegetables again. Do this a third time if there is enough room in the pan. Top the layers with cheese.

At this point, you can cover one pan with plastic wrap and then with foil and freeze it for a second dinner. If you have a horde like I currently do, stagger them in the oven. Place one pan on a rack in the middle of the oven on the right and one on a higher rack to the left.  Set your timer to switch them in 20 minutes, at the halfway cooking mark.  They should be cooked all the way through at the 45 minute mark.


Posted in Pork and Meats, Uncategorized | Tagged , , , , | 2 Comments

Pink Grapefruit Salad

This gallery contains 3 photos.

This is a quick, simple, and light lunch salad. I was concerned at first because I didn’t want to eat any fats in my dressing today, but the flavor was perfect without them. When the husband ate his bowl in … Continue reading

More Galleries | Tagged , , , , , , , | 2 Comments

Cravings: Avocado, Tomatoes, Berries

Simple Tomatoes


Simple Tomatoes

Simple Berries


  Simple Berries

We all crave something, affection most of all. I love to snuggle down with a warm bowl of berries, my love, and a good movie. I’ve been trying to watch my sugars as diabetes runs in my family and it’s easy for my blood sugars to run high. Berries have a low glycemic impact and are high in antioxidants, and are yummy, so all around, they are a good pick. They taste like cardboard if I get them “fresh” at this time of year or cost $6 a pint, so I’ve had to make do with frozen, and wait for them to thaw.

I’ve also included two of my mid-day craving snacks here. The tomato is light on your system (as long as you don’t have an allergy to nightshade produce) which means it won’t give you a stomach ache like a bag of potato chips could. The avocado dip is my favorite recipe from Heidi Swanson’s book super natural every day. I’ve paired it with Food Should Taste Good multi-grain chips (which I wish had no sweetener) and a slice of peeled grapefruit.

Simple Tomatoes

  1. Heirloom or vine ripened tomato (don’t waste your time with anything else)
  2. 1 clove garlic
  3. 1 pinch of salt
  4. 1 pinch of dried basil or 1 large fresh leaf

Wash tomato and remove stem. Slice into 8 equal pieces and arrange on a small bread plate. Peel garlic clove and crush by laying your knife flat side down and pushing down on the knife with the flat of your hand. Mince the crushed garlic and scoop half of it into a tiny spice bowl.  Add the pinches of salt and basil to the garlic and smash together in bowl.  Sprinkle garlic mix over the tomatoes.  This is so good you’ll want to lick the plate.  However, you’ll need to brush your teeth before you talk to anyone after making your breath this garlicky.

Simple Berries

  1. 1/4 pint of your favorite mix of berries
  2. 2 Tbls. unsweetened coconut flakes
  3. 10 tiny fresh mint leaves

Turn your oven broiler on to 500. Wash mint leaves and tear them if they are not tiny.

Heat a salad bowl either by filling it with boiling water for 5 minutes or in the microwave for 2 minutes (with water in it). Dry bowl and rinse berries and place in warmed bowl. Sprinkle mint on the berries.  Cover with a kitchen cloth to keep warm.

Scatter coconut flakes on a baking sheet and place in oven. Do not leave the kitchen! These things toast very quickly. After about a minute, open the oven and stir them with a wooden spoon. Remove them as soon as they are golden and toasty. Top the berries with the flakes and eat immediately.

Avocadoes and Mustard Seeds


Avocadoes and Mustard Seeds

As recipes go, tweaks happen for each family. Heidi tweaked this recipe from Julie Sahni’s Classic Indian Vegetarian and Grain Cooking.  I have a few tweaks of my own.  I’ve substituted olive oil for the clarified butter (so it will have to be roasted at a slightly lower temperature) and I like it better with a red onion than the white she uses.  I admit, I’m scared to buy chilies.  I’m afraid I’ll get one that’s too hot and ruin a good recipe. One of these days I’ll become braver, but for now, I use chili powder.  Lastly, I think the flavors need a little nutty crunch, so I add roasted peanuts or pecans to the top. These work great as hors d’oeuvres because all the flavors are best at room temperature or warmer. I always make sure there is as little bitterness as possible in my grapefruit, so I note how I remove all the membranes and pith here as well.

Avocados and Mustard Seeds for the less brave

  1. 1 pink grapefruit
  2. 1 small bunch fresh cilantro, washed
  3. pinch of salt
  4. 2 tsps. fresh lemon juice
  5. 2 ripe avocados
  6. 1 small red onion
  7. 2 cloves garlic
  8. 1 Tbls. olive oil
  9. 1 tsp. black or brown mustard seeds
  10. 1 tsp. Indian curry powder
  11. 1 tsp. chili powder
  12. 1/2 cup raw peanuts
  13. 5.5 oz bag of Food Should Taste Good multi-grain chips

Slice a thin piece off the top and bottom of the grapefruit.  Set the grapefruit on a cutting board with a stable cut side down.  Slice from top to bottom in a curved line to remove the peel, working your way around the grapefruit until all the skin has been removed. Working over a medium kitchen bowl, use a paring knife to remove each section from the remaining membrane. (All of the membrane should be removed.)  Break each section into bite sized pieces. Set aside.

Finely chop the cilantro, removing all the stems. Mix cilantro in a medium bowl with the salt and freshly squeezed lemon juice. Slice the avocados in half and twist to pull apart. Use a butcher knife to cut into the seed with a swift chop. Twist butcher knife to loosen the seed and remove. Score the avocado with a grid pattern cutting all the way to the skin.  Scoop the avocado into the bowl with the cilantro and stir to coat.

Finely chop the onion and mince the garlic cloves. Heat olive oil over medium heat in skillet and pour in the mustard seeds. Cover with a lid. Do not leave the stove! These will only take a minute to pop and I can’t tell you how many times I’ve turned around and left them to smoke!  Once they’ve popped, immediately add the onion and sauté until softened, about 3 minutes.  Add garlic and sauté 1 minute more and then add the curry and chili powder.  Heat for another minute, until fragrant. Remove from heat and pour over the avocado.

Return the skillet to the heat on medium high for 1 minute.  Add the peanuts and stir occasionally with a wooden spoon until you smell them roasting. Remove from heat.

Stir avocado mixture gently to incorporate spices, then open chips and arrange on a platter. Top each chip with a bite of grapefruit, a teaspoon of avocado mixture and a peanut.

Posted in Light snacks | Tagged , , , , , , , , | Leave a comment

Two Chili’s

Chili con Carne over Baked Potato


Chili con Carne over Baked Potato

Veggie Chili


Veggie Chili

Last week I had nine hungry males in my house. I opted to make a heavy meat dish that would fuel their workout at the gym and stave off sugar low monkey business.  I served it over a baked potato with butter, salt, and cheddar cheese. They chowed down, were satisfied, and my house was still in one piece when they left for the gym.

This week I opted for a meatless version of a dish with the same name to reset their internals.  It seems that after topping off a week of meat filled dishes with low quality food picked up hastily while working hard over the weekend, their bodies are complaining. (I wonder why…)  Usually, I only serve a dish as heavy as this beef chili on the weekend, and that’s when I’d recommend you make it too.  The vegetarian chili is the workhorse for the rest of the week.

Lewis’ Chili con Carne

  1. 4 Tbls. canola oil
  2. 3 lbs. beef chuck, in 1 inch cubes
  3. 1 Tbls. ground cumin
  4. 1 tsp salt
  5. 4 Tbls. chili powder
  6. 1 Tbls. oregano
  7. 4 cups beef/vegetable broth
  8. 2 cups red wine
  9. 2 onions
  10. 6 cloves garlic
  11. 28 oz. diced tomato in sauce (organic Muir Glen fire roasted)
  12. 2 Tbls. tomato paste
  13. 1 1/2 cups cooked black beans
  14. cayenne pepper to taste
  15. 1 fresh tomato
  16. chives for garnish
  17. sour cream

Heat canola oil in oven proof stockpot, add beef in small batches to brown removing to a bowl when done.

Pour off all but 4 tablespoons of the drippings and turn the heat to low.  Heat spices in the stockpot for five minutes, stirring to prevent burning.  Return meat to pot and stir to coat. Pour in the broth and red wine and slow simmer meat partially covered, for about 2 hours.

Chop tomato and chives for garnish.

During the last 10 minutes of simmering, sauté onions and garlic. Add onions, garlic, tomato sauce, tomato paste, and cooked black beans to the stew. Stir and taste test for spiciness, adding cayenne pepper and salt as needed.  Chop Serve in bowls garnished with tomato, chives, and sour cream as desired.

——————————

I had some corn and tomato sauce frozen from the garden last summer, so I used those in this recipe.  However, it did affect the taste in making it very sweet. (They were processed at the height of the season.) So I did have to adjust and use extra salt and chili powder to balance the flavors.  Be sure to always taste before you serve, so you can adjust!  I served this over steamed wild rice for those who needed the carbs and by itself for those who didn’t.

Adapted from Emeril Lagasse’ Vegetarian Chili

  1. 2 Tbls. canola oil
  2. 2 cups yellow onions
  3. 1/8th cup sun-dried tomatoes in olive oil
  4. 2 Tbls. garlic
  5. 2 cups (3 ears) fresh or frozen corn
  6. 8 large button mushrooms
  7. 2 Tbls. chili powder
  8. 1 Tbls. ground cumin
  9. 1 1/4 tsp. salt
  10. 1/4 tsp. cayenne
  11. 15 oz diced tomatoes in sauce
  12. 1 cup vegetable stock
  13. 3 cups cooked black beans (rinse if using canned)
  14. 1/4 cup chopped cilantro

Chop onions and mushrooms, then mince the sun-dried tomatoes and garlic. Heat oil in a large stockpot.  Saute onions, tomatoes and garlic for a few minutes in the oil.

Add the sun-dried tomatoes and cut the corn off the cob directly into the pot. Add the mushrooms and stir, cooking until mushrooms release their liquid and the corn has begun to soften, about 5 minutes.  Stir in the spices to coat everything in the pot.  Allow spices to warm to highlight their flavors.

The tomatoes and vegetable stock should go in and simmer for 20 minutes before adding the black beans. (beans can slow or even stop the cooking of the tomatoes, so add last.)

Stir and taste, adjust spice and serve in bowls, topped with cilantro.

Posted in Meatless Mondays, Pork and Meats | Tagged , , , , , , , , , , , , | Leave a comment

Mango Salsa

I saw a site with a simple way to cut mangos that has made all the difference for me. I knew there had to be a better way! The site also has good information on ripeness and availability.  It did bother me that it slightly suggested that you could tell when a peach is ripe by pushing on it.  (This, by the way, just bruises peaches.  You can tell whether peaches are ripe by scent in the store or by the way the fall into your hand when you are picking them.)

Mango Salsa


Mango Salsa

Naturally, watching the video made me crave mango salsa something intense.  My favorite way to eat mango salsa is warmed on top of brie. It’s so good. I’ve had store bought mango salsas, but they are usually so sweet that you lose the mango flavor.  The tricky part about mango salsa is that the mango needs to be perfect or otherwise it has a slightly sour or earthy, muddy flavor, depending on its degree of ripeness or over ripeness.  I like my mango salsa rather mild, due to the strong brie flavor, but you can make a heat substitution if you like yours with more kick.

Mango Salsa

  1. 1 mango
  2. 4 Tbls. fresh chopped cilantro
  3. 2 Tbls. fresh lime juice
  4. 1/8 tsp honey
  5. 1/4 tsp. chili (mild version) 1/4 tsp chili pepper flakes (hot version)
  6. 1/8 tsp garlic
  7. pinch of salt
  8. wedge of brie

Cut mango as per video, slicing the mango into very tiny dice in a small bowl. Rinse and chop leaves of cilantro into a chiffonade (very fine). Discard the stems and add to the mangos.   Squeeze and pour the fresh lime over the mangos.

In a very small bowl, mix the honey, chili, garlic and salt.  Pour over the mangos and mix everything together gently.  (If over mixed, it will become puree quickly.)

Slice a wedge of brie and remove the rind with a sharp knife. Place it on an oven proof plate and top with salsa.  Bake at 350 for 10 minutes (or cheat and put it in the microwave for 45 seconds.)

Vanity therefore it is, to seek after perishing riches, and to trust in them. Vanity also it is to hunt after honours, and to climb to high degree. Vanity it is to follow the desires of the flesh, and to long after that for which thou must afterwards suffer grievous punishment. Vanity it is, to wish to live long, and to be careless to live well. Vanity it is to mind only this present life, and not to foresee those things which are to come. Vanity it is to set thy love on that which speedily passeth away, and not to hasten thither where everlasting joy abideth. – Thomas A Kempis (1380-1471)

Posted in Cheese | Tagged , , , , , | 1 Comment

Curry Spiced Chicken and Wild Rice

Curry Spiced Chicken


Curry Spiced Chicken

The original method for this dish comes from a rustic “beer can” chicken recipe.  The bird is propped upright by the full can of liquid and is kept moist throughout the cooking process by its evaporation while in a closed pot.  I’ve put together a rub that spices the outside of the meat while the flavored moisture cooks the inside.  The poultry, combined with a fruity sauce, carrots, and mushrooms balances well with the quiet wild rice.

Curry Spiced Chicken and Wild Rice

  1. 1 whole 3-4 1/2 lb chicken
  2. 1 lb carrots
  3. 3 stalks celery
  4. 2 red onions
  5. 2 Tbls. olive oil
  6. 1 tsp. minced garlic
  7. 1 cup orange juice
  8. 1 Tbls. lime juice
  9. 1 Tbls. cherry or blackberry jam
  10. 1 20 oz. can pineapple with juice

Mushroom Sauce

  1. 1 Tbls. butter
  2. scant 1/4 cup white wine
  3. 1 tsp. minced garlic

Spice Rub

  1. 1 Tbls. ground cumin
  2. 1 Tbls. curry powder
  3. 1 Tbls. chili powder
  4. 1 1/2 tsp. ground allspice
  5. 1 1/2 tsp. ground black pepper
  6. 1/2 tsp. ground cinnamon
  7. 1 tsp. salt

You will need an empty glass jar that can fit inside the chicken cavity.  (I used an empty jelly jar with a narrow mouth.) You will also need a very tall pot with lid. (I used my canning pot.)

Spiced Chicken

Preheat oven to 350 F and move the rack to the bottom of the oven. Remove all other racks. Rough chop 1/2 of a red onion and 1/2 tsp garlic. Move these to a food processor and add list of spices for the spice rub. Process into a paste.  Remove bowl of processor and set next to your sink.

Open pineapple can and pour juice into glass jelly jar.  Set pineapple chunks next to the stove for later.  Set tall stockpot and jelly jar next to spice rub by sink. Reserve 1 tsp. of the spice rub paste and set in small bowl by stove top.

Open chicken and drain. Remove anything left in top or bottom cavities. Lift skin away from the body, carefully to avoid tearing, and break any tendons connecting skin to bones. Use spice rub paste to coat the meat of the chicken under the skin, including down into the legs and around the back of the bird.

Insert the glass jar full of pineapple juice into the base of the chicken and stand it up it the tall stockpot.  Now scrub your sink and your hands and place the bird on bottom rack in oven. Cover with lid. Don’t rinse the food processor bowl, just set it back on the food processor.  Set timer for 1 hour. Relax.

After an hour, you will need to start the rice in the rice cooker and begin on the sauce.

Pineapple Carrot Sauce

Wash and chop carrots into 3 inch pieces. Start steaming the carrots now.  Remove stems of mushrooms and wash tops.  Slice mushrooms 1/4″ thick and set aside.

Finely chop celery, second onion, and 1/2 tsp garlic. Warm oil in a quart pan on medium.  Add onion and celery for two minutes stirring occasionally, then add 1/2 tsp. garlic and cook for 1 more minute, then add reserved 1 tsp. of the spice paste. Stir to coat the onions and celery.

Add 1 cup orange juice and 1 tablespoon of lime juice and continue to cook for 5 minutes, stirring often. Incorporate the 1 Tablespoon cherry jam, then remove from heat. Pour mixture into the food processor and blend until smooth.

Pour pineapple chunks and raisins into the now empty saucepan and return pot to medium heat. Set strainer with a long handle over the pot. With a wooden spoon, stir puree through strainer into the pot until all liquid has returned to the pot.

Discard the thick chunks and rinse out strainer. Add the carrots to the mix.  Move the pan to a back burner turned on low and cover.

Place medium to large sauté pan on stove top and melt butter and stir in white wine over medium heat. Add 1/2 tsp. garlic and cook until sauce is reduced by half before adding mushrooms. Cook mushrooms until tender, then salt and pepper to taste.

The bird is done when the legs and other meat starts coming loose from the bone. If you cook it too long the whole thing will fall apart.  Be careful when you lift the chicken out of the pot to the serving dish.  The wings of mine sometimes stick to the sides and the chicken must be disengaged from the glass jar as well.

Plate with rice on the bottom, mushrooms with sauce over the rice.  Layer the carrots and pineapple next and top with slices of chicken.

Posted in Poultry Heaven | Tagged , , , | Leave a comment

Bell Pepper and Artichoke Heart Pasta

Bell Pepper Artichoke Heart Pasta


Bell Pepper Artichoke Heart Pasta

I began with artichoke as the protein inspiration in this dish and thought that it compared to mushrooms in earthiness.  Luckily, all the munchkins enjoy artichoke as much as my siblings did, so I had a good go to for a meat replacement in their “acceptable” palate.  I began the dish by cooking the artichokes with my standard method and allowing the little ones to nibble away all the leaves as an appetizer as I started into the rest of the recipe.  I then rescued the hearts to add to the main dish.  This worked well as it kept their hunger at bay, gave me help, and bought me some cooking time.

This recipe’s fresh flavor is made possible by having all the veggie prep done and close at hand, using a method similar to a Chinese stir fry.  This can also be served without the pasta or with reduced pasta for those with diabetic concerns and tastes just as delicious.

Bell Pepper and Artichoke Heart Pasta

  1. 5 artichoke hearts, leaves and choke removed
  2. 2 cups walnuts
  3. zest of one orange
  4. 18 oz. tricolor rotini pasta
  5. 2 Tbls. olive oil
  6. 1 fennel bulb
  7. 2 red bell peppers
  8. 1 small bunch scallions
  9. 1 granny smith apple
  10. 1 tsp. garlic
  11. 1/2 cup white wine
  12. 1/2 cup veggie broth
  13. juice of 1/2 orange
  14. 1 Tbls. herbs de provence 
  15. pepper and salt to taste

You will want multiple bowls to set beside your stockpot with each of these ingredients at the ready.  Slice the artichoke heart into 1/4″ strips for the first bowl.

Rough chop the walnuts into second bowl and grate the orange zest over them. Stir to coat.

Remove the fronds from the fennel bulb and wash the bulb, then cut in half.  Turn the cut face down and slice into 1/4″ slices. Place these in bowl three.  Wash, de-stem, and remove the seeds from the bell pepper and slice into 1/4″ strips as well. These can share bowl three.

For bowl four, core apple and chop into bite sized pieces.  Add the scallions, sliced thinly.

Put noodles on to boil as per package directions.  If you are like me, set the timer for the noodles.

Heat olive oil over medium heat in a large stockpot and add fennel bulb. Saute 3 minutes without stirring, allowing to brown.

Add bell pepper and combine, cooking for 2 more minutes.

Add scallions and apple and stir.  Mix in garlic and artichoke hearts and saute for 2 more minutes.

Stir in 1/2 cup white wine, after 2 minutes more add the 1/2 cup veggie broth and orange juice.

 If you are using pasta, drain and add to stockpot. Mix in spice and walnuts and taste.  Adjust needed salt and pepper, then serve.

Posted in Meatless Mondays | Tagged , , , , , , , , , , , | Leave a comment

Mother’s Salmon Hash

Flavourspot Waffle


Flavourspot Waffle

When we are looking for a home style breakfast and I don’t want to cook, there are two places we go.  The first is quick and easy, filling to bunches of munchkins, and fine for wandering little cousins.  It’s Flavourspot. With their waffles in foil, full of ham and gouda, sausage and maple syrup, or Nutella and raspberry jam, it’s heaven if eaten while crispy.

Flavourspot is a food cart with picnic tables and since Portland’s usually chilly,  you shouldn’t have a problem eating fast.

The second place we choose, when it’s really cold, or we want a sit down breakfast, is Mother’s. Everyone has their favorites, from waffles to scrambled eggs, but there is only one dish for me.  That dish has always been salmon hash. When ordered, it comes with two eggs and toast, but I always sub in her freshly made pork apple sausage instead.

The chef/owner, Lisa Schroeder has a cookbook  out and I got it, hoping to find both the salmon hash and her cinnamon roll recipe.  While the book did have my wonderful hash, it didn’t have the cinnamon rolls.  After searching everywhere online, I finally contacted her and asked whether she could part with it to add to the back of her cookbook sitting on my shelf.  She was so sweet and sent it to me!

She’s had the salmon hash recipe reprinted in Relish magazine and has a link to it on her site, but it’s a little hard to read and I did make some slight adjustments, so I’m going to post that recipe here.  You’ll need to buy the cookbook and email her for the cinnamon rolls, or just go down this weekend and eat some fresh…

I used one half of  a large wild salmon from a friend who fishes in Alaska.  You will need a firm wild salmon for this, or it won’t hold up to the cream.  I also did not mix the potatoes into the cream as she does, because we like the potatoes to stay super crisp. (Her potato recipe is the same as my grandmothers, so I’ve already been making them for years.) When I have hash at the restaurant, I get a little too full because of the cream to veggie ratio, so I increased the green veggies by adding fresh asparagus and scallions.  This also stretches the sauce a little further and having more makes all the munchkins happy.

Grandma’s JoJo’s

  1. 8 large red Potatoes
  2. 2 large sprigs of thyme
  3. 2 large sprigs of rosemary
  4. 1 tsp. salt
  5. 1/2 tsp. chili powder
  6. 1/2 tsp garlic powder
  7. 1/4 cup olive oil, plus more for the pan

Oil a large baking sheet generously and pre-heat oven to 450.  Remove fresh spices from stems and place in a spice grinder.  Pulse until the spices are finely ground.  Mix all spices and olive oil in a large bowl. Wash and slice each potato lengthwise into 4 pieces. Add potatoes to bowl to coat with spices.  Arrange potatoes cut side down on baking sheet.  Bake for 20 minutes, then use spatula to rotate to face the second cut side face down, being careful to keep the crust intact. Bake another 20 minutes.  Turn heat to 200 and keep warm in oven until salmon is ready.

Mother’s Salmon Hash

  1. 1 bunch of asparagus (about 2 cups when chopped)
  2. 4 scallions (green onions)
  3. 2 to 3 leeks
  4. 2 Tbls. butter
  5. 1 half of a large wild salmon, skin and bones removed, cut into 1 inch dice
  6. 1 tsp. salt
  7. 1/2 tsp. freshly ground black pepper
  8. 1 cup heavy cream
  9. 1/4 cup chopped fresh chives
Mother's Salmon Hash

Mother’s Salmon Hash

Snap the woody ends off of the asparagus and trim scallions.  Trim dark green and roots from leeks, then slice lengthwise.  Slice leeks and asparagus into 1/4″ pieces, reserving the asparagus tips.  Chop scallions fine.  Rinse all vegetables in a large colander.

Melt butter in a large saucepan and sauté green vegetables until the asparagus begins to lighten, about 3 minutes.

Add salmon and sauté until salmon turns opaque, about 3 minutes.

Add cream and simmer until most of the liquid has evaporated and cream has thickened.  Be careful not to over stir the salmon so that it remains in beautiful chunks.

Plate the potatoes and use a ladle to pour the salmon cream over the top.  Garnish with chives.

Posted in Fish Night | Tagged , , , , , , , , | Leave a comment

Valentine Baking

before baking

before baking

Baking, like math, is a science. When I’d sit down to take a math test, I’d do my best, turn it in, like tucking a cake in the oven, and think, “That went well.”  I was always surprised when it came back with a big red “C-” on the top sheet. “What did I do?” I would wonder.

Bread, cake, pie crusts, cinnamon rolls… they elude me. I am by nature an artist, one who tinkers until the magic happens. But once the heat is applied to the pan, there can be no more adjustments, no tastings, no second checks to see whether you’ve forgotten the salt.  I own enough baking cookbooks that even I should have figured it out by now. But for me, it’s like the munchkin’s engineering calculators, more of them do not make a better engineer.

So, I slide the pan in the oven, set the timer, and forget about it. If it turns out, there will be a lovely extra after dinner.  If not, there’s always ice cream.

Chocolate Cupcake


Chocolate Cupcake

I found a forgiving chocolate recipe at the sophisticated gourmet this weekend and tried it out for the munchkins for a Valentine’s treat.  Now, I’m not going to give you all of his wonderful tips, as I really think that you should read them at his site, and they are good tips, so really do go there. (Including a link on how to bring your egg and sour cream to room temperature.)  However, I did make the recipe up twice with slightly different ingredients and I wanted to point out the difference between them here. I used coconut sugar instead of white granulated sugar.  That rarely makes a difference in baking, only adding a very slight coconutty flavor to the end product.  It also reduces the sugar hit to your body as it’s easier to digest and process.As far as I have seen, it behaves the same as cane sugar in the end product, so I’m happy.

Chocolate Cupcakes 

Second, I used whole wheat pastry flour as it’s just a bit healthier and as this recipe doesn’t require a yeast rise, it doesn’t affect the rise either.  Third, I don’t like using oil in my recipes as it tends to come out heavier and I’m all about light fluffy baking products. I use apple sauce for 3/4 of the oil and finish the rest off with oil.  Fourth, the first time I made this, I was out of sour cream.  I experimented (usually earning myself a C-) with soured half and half and skipped the boiling water.  The result was a denser, more intense chocolate mouth feel with a crisp candied edge.  When I made it the second time, with sour cream, it was a bit more molten and was especially lovely a ‘la mode.  Either way, it’s chocolately goodness.  Oh, and I’m not really an icing girl, so if you wish them iced, you can print his recipe for frosting as well. (Though I’m going to be trying out a chocolate cream cheese mocha frosting on these next time.)

Chocolate Cupcakes:

  1. 1 cup coconut sugar
  2. 3/4 cup plus 2 Tbls whole wheat pastry flour
  3. 1/4 cup plus 2 Tbls natural unsweetened cocoa powder
  4. 3/4 tsp baking powder
  5. 3/4 tsp baking soda
  6. 1/2 tsp salt
  7. 1 egg room temp.
  8. 1/2 cup soured half and half
  9. 1/4 cup applesauce and oil (fill a 1/4 cup 3/4 of the way full and finish off the 1/4 cup with oil)
  10. 1 Tbls vanilla extract

Preheat oven to 350.  Butter ramekins and then coat them lightly with flour, shaking off any extra.  Mix together all dry ingredients, sugar through salt.  Add wet ingredients and stir just until mixed.  Spoon 3 tablespoons of batter into each silpat cupcake liner or 8 tablespoons into each large ramekin and set on silpat lined baking sheet.

Bake for 15 minutes and then rotate pan and bake for an additional 5.  Cupcakes are done when a toothpick inserted into the center comes out clean.  Serve warm with ice cream or fresh raspberries.

Chocolate Valentines in ramekins


Chocolate Valentines in ramekins

Posted in Uncategorized | Tagged , , , , , , , , | 2 Comments